
A palette to try
These swatches are colour suggestions, not a finished colouring example. Use the closest pencils you have; exact matching is not needed.
- Fleet blueCab and selected details
- Pale blue-greyLight metal layer
- Steel greyTank edges and shadows
- Warm ochreSmall contrasting details
Work through the page.
You need your chosen printed page, a few coloured pencils and a scrap sheet. An adult can help choose suitable tools for a child. Work lightly at first and stop whenever you want; finishing the page is optional.
1. Choose a fleet colour
Pick one colour for the cab and one or two small details elsewhere on the truck. Repeating the same blue in separate places can tie the vehicle together. Test it beside a grey on scrap paper. Decide which details will get the accent before colouring, so you do not need to make every small part a different colour.
2. Leave a light band on the tank
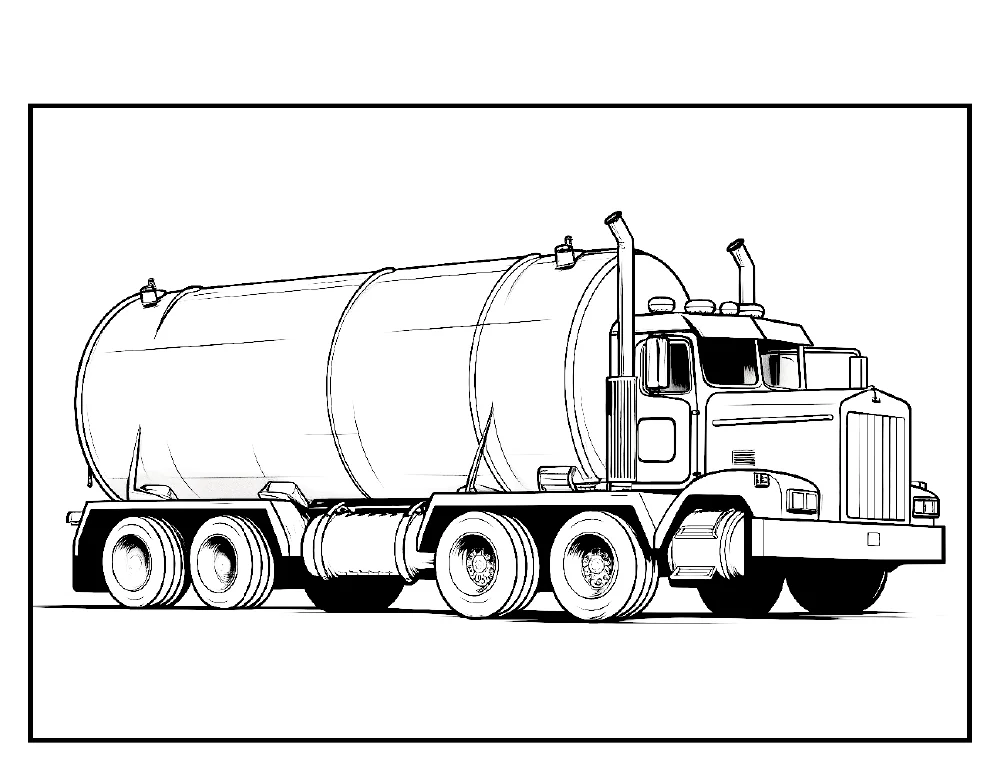
Find the large tank shape and imagine a broad band of light running along its middle. Leave that band mostly white. Lay a very pale blue-grey over the areas above and below it, following the tank with long, light strokes. Keep the printed seams visible instead of tracing heavily over them.
3. Round the tank with darker edges
Add steel grey near the upper and lower boundaries of the tank. Ease the pressure as you move towards the pale middle. Try this on a small area first. The change from dark edge to light centre is the exercise; there is no need to make a perfectly smooth metal surface or reproduce real reflections.
4. Colour the cab and wheels
Fill the cab with a light blue layer, then add another layer below windows and along lower panels. Keep any glass paler than the body. Use grey for the tyres and leave some hub details lighter. Sharpen the pencil for small gaps, rather than pushing harder with a blunt tip.
5. Finish with a few repeated accents
Add ochre to a few suitable small details if you like, then look for blue areas that could use a second light layer. Keep the ground softer than the wheels, adding a short shadow directly below them. A restrained background lets the shapes of the tanker stay clear. Stop before every available space becomes equally dark.
Try a second version.
Draw three small rectangles on scrap paper. Shade one evenly, one dark at the edges and one dark only along the bottom. Compare the effects, then use your favourite on another truck in the sample pack.
If a detail is tricky.
- The tank looks flat.
- Leave the middle lighter and add a little more grey only near the outside edges.
- Small details are disappearing.
- Pause the dark layers and leave neighbouring areas pale. Not every bolt or seam needs a separate colour.
These are creative colour suggestions, not a promise of an exact vehicle, aircraft or team livery. Use the printed outlines as a starting point and make the colour choices your own.
Keep exploring Trucks.
50 truck designs in the full paperback. The free four-page pack is a small selection, not a digital edition of the complete book.
See the full book, previews and details
Buy on Amazon UKChoose your Amazon store at the top of the page. Amazon shows local prices, stock and delivery.
More notes on materials and colouring together · Download the printable Trucks pack